Are you looking for the best alternatives to Newspaper Theme by tagDiv? Why would you not like to use the best theme on the market? Why? It is because it is so familiar; just check out our site for the same reason; it is so good that about everyone uses it!
The print medium is changing, especially the newspapers. The focus has now been shifting towards the Internet. Almost all significant publications are moving to the online space. That would also explain the popularity enjoyed by the genre and a host of individual news-based blogs and sites flooding the Internet.
Maybe most of us have been thinking that the shift to the online mode is devastating the feel associated with the traditional way that we have long been fascinated with. However, we would think otherwise. Yes, moving to the Internet has its advantages.
There would be no barriers or no middlemen of any sort. Your content is directly delivered to your followers. But, it comes with another challenge. You need to keep your content engaging and riveting. Of course, you have fantastic content- but what would matter is how you would present it.
Themes are what would help you achieve the objective. If you are looking for the best Newspaper Theme for your news sites, this post should help find the best option for your needs.
Newspaper Themes – Best Alternatives to Newspaper Theme by tagDiv
Well, exactly. tagDiv has been a great developer when we look at the newspaper
themes. Though they have a host of themes for the genre,
Newspaper is TagDiv developed and one of the most popular themes.
The clean and structured look would give it an excellent look and feel. A neat, clean, and intuitive organization of all the options and settings would make it a more comfortable choice for monitoring and handling your website’s content. The latest
Newspaper 8 theme offers you a completely overhauled interface and functionality.
However, if you have got used too much to the
Newspaper 8 theme and would want to look for a change, there isn’t a shortage of options at your disposal. Here is a collection of the best tagDiv Newspaper theme alternatives that would change the way you have been serving your audience with News, views, and opinions.
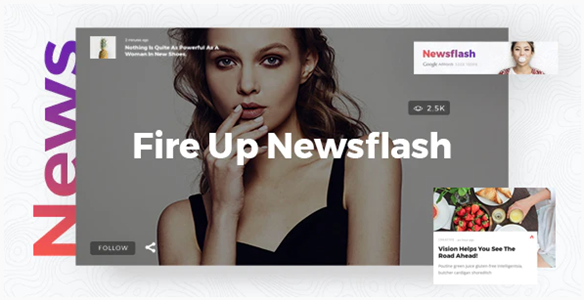
31. Newsflash:
 Demo Link
If you want to make a modern news and magazine website, Newsflash is a good option. It is a WordPress news theme equipped with chic and clean designs that are perfect for lifestyle news websites.
There are 6 pre-made homepage layouts included in this theme. Each of the templates is designed using the WPBakery page builder. It enables you to customize the theme the way you want effortlessly.
Its broad collection of pre-designed homepages, eye-catching elements, and functionalities allow all news agencies, magazines, publishers, etc., to design an appealing online publication with extreme ease. This theme comes in handy whether you intend to publish a text or image gallery or audio or video. You can effortlessly create multiple types of posts.
Key features:
- It supports WooCommerce, WPML, and much more.
- It comes with more than 800 Google Fonts.
- It comes with an easy one-click import of demo content to save you time.
- No coding knowledge is needed.
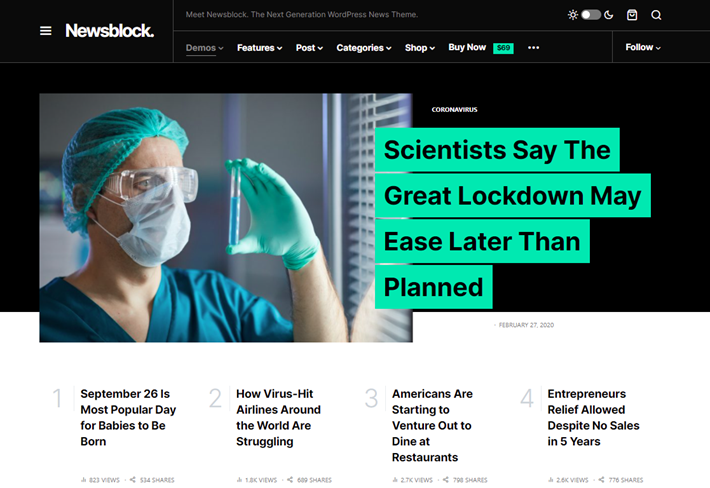
30. Newsblock:
Demo Link
Boasting a clean look, this WordPress newspaper theme lets your website stand out. It is a minimalistic-based theme with exclusive features to make your website look fascinating. You can choose from 9 demos which you can alter later on.
One of the unique traits of Newsblock is its dark mode toggle. It lets users transition between night and day mode through a click.
Other essential traits include custom widgets and blocks, Instagram integration, lazy loading, and newsletter subscription. With abundant social integrations, you can grow your audience on different social networks and let your content go viral.
According to your preference, you can insert any custom blocks and accordingly build pages. You can include subscription forms, social widgets, and different layout blocks.
Key features:
- Pre-build one-click demos help you launch your magazine or news site and keep it running at lightning-fast speed.
- Canvas is a block-based page builder which comes integrated into Newsblock. It helps you to build any custom layouts.
- 30 Post blocks help you build complex grids of the featured posts sections.
- There is a provision to add YouTube videos as post previews to post page headers and blocks.
- Multiple headers and footer styles are available with exceptional options like subscription forms and social links.
- The features that optimize performance are lazy loading, built-in AMP support, adaptive image sizes, low-quality image placeholders, etc.
- Built-in galleries contain integrated styles for the WordPress slider, core, and justified galleries.
- Other features are one-click demo import, multilingual & RTL support, SEO optimized, post views counter support, auto-loading posts, easy customization, GDPR-compliant, and regular updates.
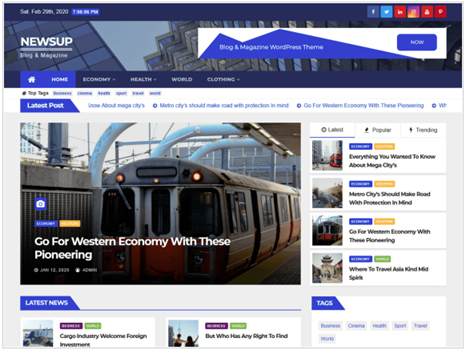
29. Newsup:
Demo Link: https://wordpress.org/themes/newsup/
Are you looking to create a professional news website with an elegant design? If yes, then the Newsup is a beautiful free WordPress newspaper theme.
Key features:
- Its customizable design helps you create magazines, newspaper websites, and blogs.
- Translations can be added to the website with the help of the WPML plugin.
- You can create modern content with the help of the Gutenberg block editor.
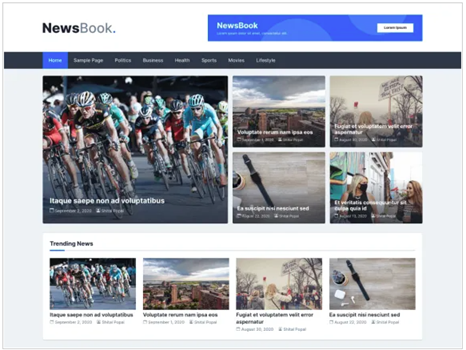
28. NewsBook:
Demo Link: https://wordpress.org/themes/newsbook/
This newspaper theme by OdieThemes boasts a simple yet functional design. It is a responsive news WordPress theme that is easy to use and easy to set up. Moreover, it is a lightweight theme optimized for speed and quick loads. NewsBook comes in handy for creating News, magazines, publications, and blog sites.
Key features:
- Being search engine friendly can significantly boost your SEO results.
- It contains unique widgets which are specifically designed for news/magazine websites.
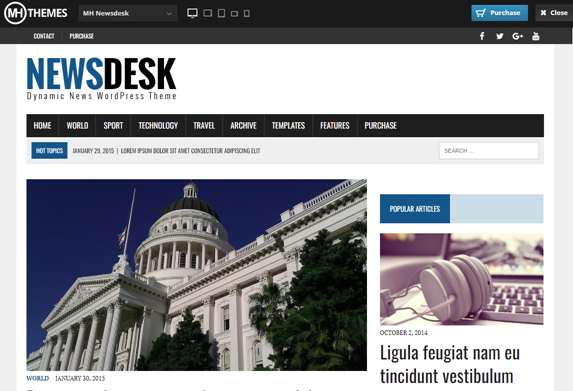
27. MH Newsdesk:
Demo Link
MH Newsdesk WordPress theme is a modern newspaper theme boasting a vibrant template. You can use it to create up-to-date news websites and the latest online magazines for all types of purposes.
You can conveniently create vibrant news websites with their excellent flexibility and features. Generally, this dynamic WordPress theme is helpful for small, middle-sized, and large news agencies, professional bloggers, and online newspapers.
Key features:
- Its flat design focuses on exciting headlines and topics you want to publish.
- It is fully responsive, so it appears impressive on all screen size’s resolutions.
- With this theme, you can easily maintain your online presence and accustom your website the way you like.
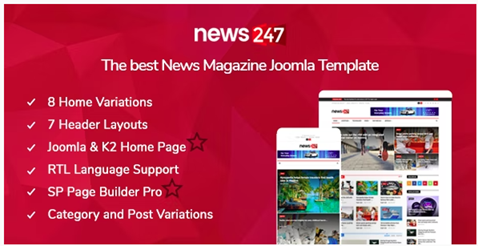
26. News247:
Demo Link
For news websites, magazines, small-sized companies, and business news websites, News247 is very useful. It is built with Bootstrap4 framework, Unique home variations, Elementor, etc.
Boasting minimalistic and clean design, this theme is handy for creating a magazine or news website with a modern feel and look.
Key features:
- It is built using the Elementor page builder.
- 9 customizable homepage layouts are available. Each of them shows unique styles of content arrangements.
- This theme is optimized for monetization with fixed spots to allow ad placements, and it contains a mega-menu.
- Other features include SP Page Builder Pro, Helix3 template framework, predefined color styles, News Show Pro GK5, Roksprocket, K2, etc.
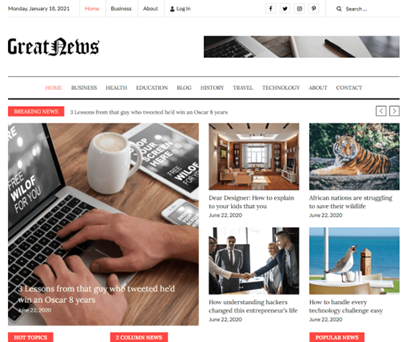
25. Greatnews:
Demo Link
Presented by themepalace, Great News is a clean and stylishly designed multipurpose WordPress newspaper theme. Especially for creating blogs, magazines, and new-related websites, this theme proves helpful.
Its professional and contemporary design allows easy and quick setup. To avoid lag, it is well optimized for performance and speed.
Key features:
- It is incredibly responsive and flexible.
- It is cross-browser compatible.
- The design and content published via this theme appear sleek irrespective of your browser version and screen resolution.
- It follows well-practiced SEO.
- Its admin panel helps you to edit and design the theme.
24. NewsTube:

Demo Link
NewsTube is mainly designed for those magazines that deal with plenty of videos. It can also be used for your news websites. If you aim to create a newspaper website that intensely focuses on video-based News, then this theme is worth considering.
Two of its prominent traits include being fully responsive and retina ready. With the help of plenty of theme options and flexible theme layouts, you can effortlessly customize your website the way you desire.
Moreover, you can post videos from the front-end, prepare video channels and playlists, and import YouTube videos and media to your website. You enjoy flexibility while creating your newspaper website with tons of customization options.
Key features:
- The intuitive front-end interface helps users to submit their content easily.
- User subscription is supported.
- 16 ready-made demo websites are supported.
- The slider, header navigation, blog, and article options help to depict your featured content and images to entice readers.
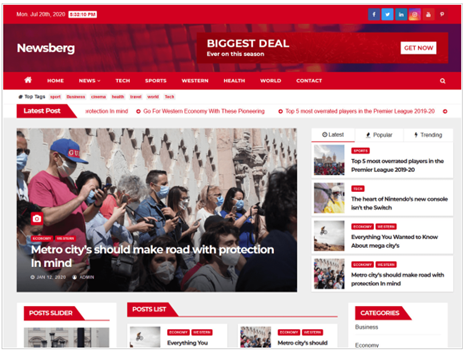
23. Newsberg:
Demo Link
The design of this free WordPress news theme is inspired by reputed news websites like CNN and BBC. Plenty of valuable sections and widgets are available for demonstrating your trending posts and articles on the homepage of your website.
Newsberg is suitable for dynamic News, magazines, newspapers, blogs, publishers, editors, online and gaming magazines, personal blogs, news portals, review sites, publishing sites, and any creative website.
Key features:
- Gutenberg editor and WPML are supported.
- This theme is optimized for SEO and mobile devices.
- It is translation and RTL ready.
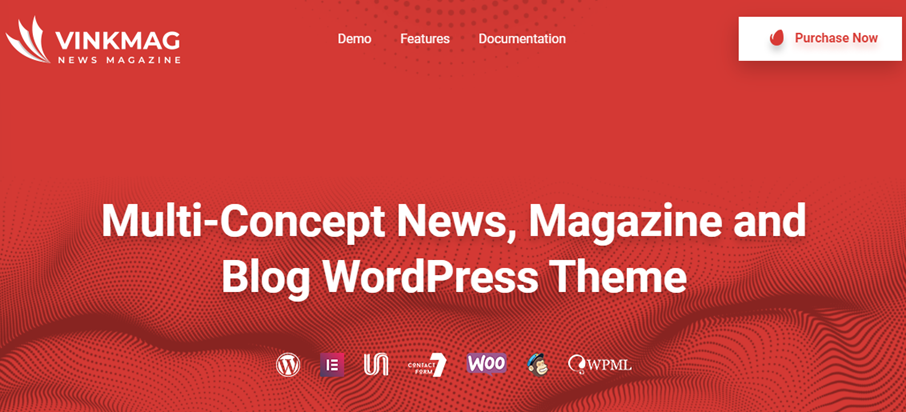
22. Vinkmag:
Demo Link
Vinkmag is a flexible WordPress newspaper theme with an extensive assortment of predefined demos. It is easy to customize this theme with the help of the Elementor page builder. With the use of Post Slider, this theme lets you showcase all the trending posts, portfolio posts, and featured posts.
So, you benefit from the ability of customization. Furthermore, you can select from light and dark modes and specific niche designs that fulfill your needs. Compared to other websites, this theme helps you load content five times faster.
Key features:
- VinkMag is compatible with the Google AMP plugin, which makes your website mobile friendly & lets it load faster on mobile devices.
- One-click installation saves you time and effort during setup.
- Right to Left Langauge Support includes Hebrew, Arabic, etc.
- Other features are a reading progress bar, customizable width, editable headers & footers to post slider, easy monetization, and WooCommerce compatibility.
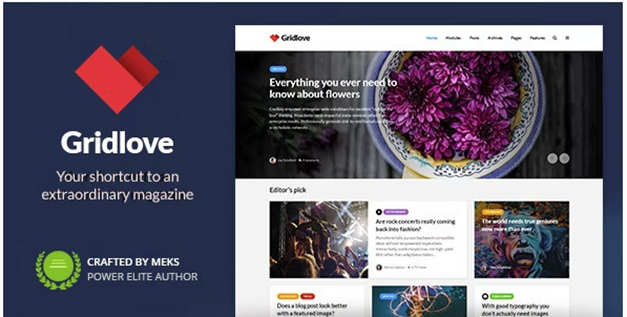
21. Gridlove:
Demo Link
Gridlove is a grid-style news and magazine WordPress theme with creative design. With ample predefined templates and layouts, this theme allows you to design an appealing website in a few minutes. No coding skills are needed.
Furthermore, Gridlove comes with a fully functional demo website that helps you get started with it as quickly as possible.
Key features:
- Customizable single post layouts help you provide your articles with a unique touch.
- The easy-to-use yet advanced theme options panel allows the setup of your website within 5 minutes.
- It supports audio, video, image, and Gallery post formats.
- Most widespread WordPress embed features are supported.
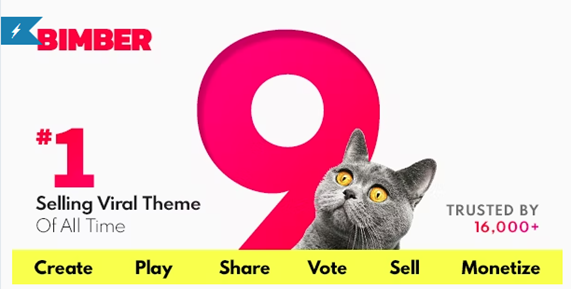
20. Bimber:
Demo Link
Bimber is a premium WordPress magazine theme that helps you launch a fully functional viral news website through its powerful features. You can launch a feature-rich viral site in 24 hours. You would benefit from its trending listings and multiple ad locations.
Key features:
- Essential features include sharing buttons, multiple locations in the layout for advertisements and lightweight code, and content filtering.
- Types of viral content you can share using this theme are breaking News, quizzes, polls, lists, GIFs, gags, videos, social bookmarks, freebies, open lists, celebrity news, and gossip.
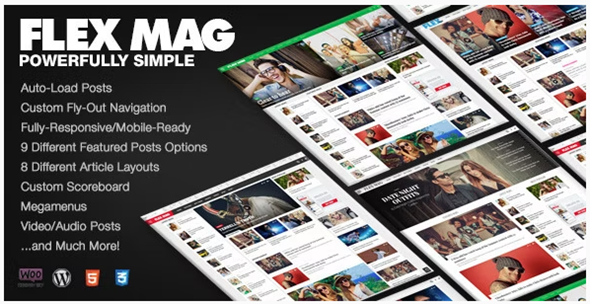
19. Flex Mag:
Demo Link
FlexMag is a responsive WordPress news and magazine theme that blends simplicity and performance. You can access ample options to customize your website. All the features are easy to understand and use. No coding skills are needed.
Key features:
- For creating posts, FlexMag comes with fly-out navigation, a custom scoreboard, and auto-loading functionality.
- 4 unique preset skins are available to let you customize layouts and designs.
- You can choose from 8 unique article templates and 9 featured posts options.
- More than 800 Google Fonts are available to choose from.
- 8 custom widgets provide you the simplicity of use and flexibility to showcase your content the way you prefer—no need to alter custom widgets and code.
- Theia Sticky Sidebar plugin enables your sidebar content to follow visitors as they navigate down the page. It provides long-term visibility for ads and other significant information that you intend to show to your visitors.
18. Disto:
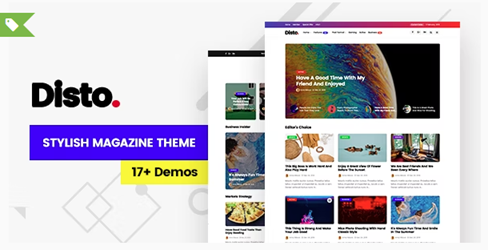
Demo Link
Disto is a stunning WordPress newspaper theme with 10 appealing samples. You can carry out customization tweaks to design the website the way you like.
Key features:
- Different slider styles, homepage styles, custom sidebar, and theme options provide plenty of customizations.
- It supports Gutenberg block builder, AMP, and famous plugins.
- Other essential features include slider, widgets, carousels, AMP, social sharing function, and RTL compatibility.
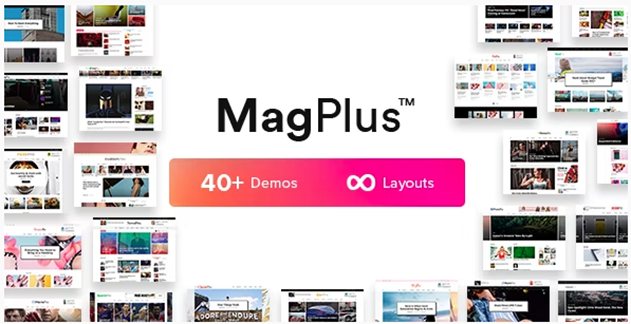
17. MagPlus:
Demo Link
If you want to design a professional-looking newspaper or magazine website, MagPlus is useful. It is a great choice to fulfill your mass communication and advertisement targets. With 40+ demos, you benefit from automatic updates and documentation.
Its key characteristics include ease of customizing, lightweight, and flexibility. There is a massive collection of built-in sliders, header, footer, and widgets. No coding is needed.
You can use the available demo or build your own. All necessary features you need to write and edit articles are available. The developer of this theme carefully created it using multiple Newspaper, magazines, and blog niches. Also, this theme is designed keeping in mind bloggers, professionals, and editors.
With a single click, you can adopt multiple parameters. By accessing layouts, colors, widgets, menus, etc., you can customize your website in a preferred way.
Moreover, you can access unlimited colors, typography options, blog pages, portfolios, icons, and widgets. The installation is accessible on the WordPress platform or by FTP. Easy-to-understand documentation is available for installation.
Key features:
- Top of Form
- Bottom of Form
- 30+ widgets are available to create appealing websites.
- With the help of the WordPress native menu screens, you can access a fast Mega menu option.
- You can add beautiful icons to any of your menu elements.
- WordPress Customizer works as a live preview framework for any modifications in WordPress. It presents a clean and uniform interface for users.
- Google AMP support makes sure your website runs smoothly on all devices.
- Google AdSense is supported for publicity.
- The multilingual translation feature helps international readers to participate easily.
- Contact forms and WooCommerce are helpful for business professionals.
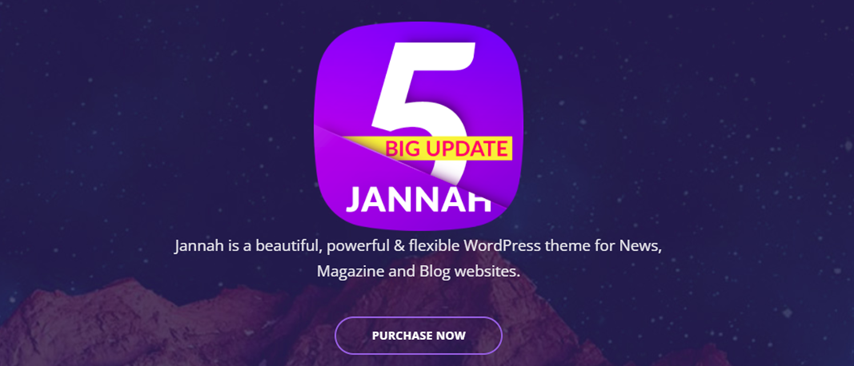
16. Jannah:
Demo Link
Jannah contains many pre-made demos that you can import with a single click. The demos of this theme are more than a skin –with more than 20 to select from.
Each demo represents a fully-functional website with menu structures, pages, and demo content designed to reduce the hard work of establishing your website. This theme is flexible and encompasses various types of formats.
The XHTML valid code and intelligent design guarantee maximum search engine visibility for your WordPress website. Being touch-friendly, you can browse very easily on tablets or smartphones.
The balanced typography, large buttons, and responsiveness provide you desktop-like browsing experience. The customizable mobile navigation helps you jump to a particular point in the long-form content.
Key features:
- Being compatible with AMP, this theme makes your content mobile-optimized.
- The page speed score of 98% denotes efficient performance. Lazy Load image is supported.
- The backgrounds can be changed to vibrant colors, images, or gradients. Also, you can change scenes to set the social icons and search form.
- Being WooCommerce integrated, this theme has explicit predefined spaces for ads.
- The email list helps you to improve your customer’s loyalty.
- This theme is integrated with industry-standard tools like Feedburner and MailChimp.
- It keeps the users integrated into a social media community with BuddyPress.
- You can add notifications to the menu.
- Different layouts are fullwidth, bordered, boxed, masonry, or straight up One Column. You can try any design to check how it fits your content.
- With the help of the Theme Options Panel, you can mix and match pages, headers, fonts, and colors.
- Parallax Effects and video backgrounds are supported. Live feel backgrounds navigate with content or utilize full page background to convey dramatic effect. The live environments can be inserted into homepages, landing pages, and CTA.
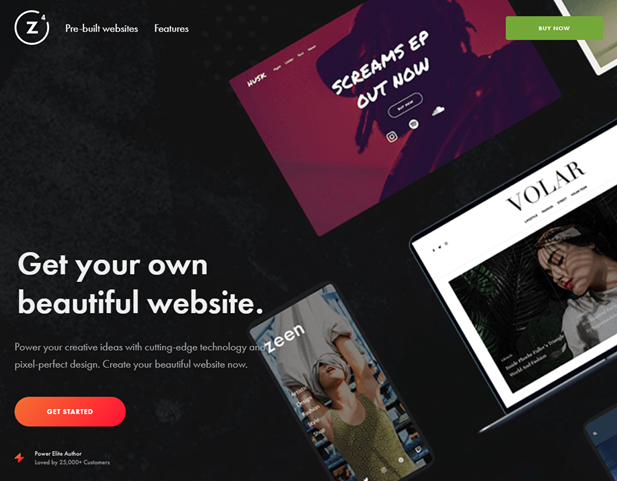
15. Zeen:
Demo Link
Zeen comes with all the vital features you need while searching for the ideal Newspaper WordPress theme. The combination of functionality and style can be seen in this theme. It contains plenty of demos that are easy and quick to install.
All the demos are created using cutting-edge WordPress features. Simply import them on your website. Moreover, you can mix and match elements. You can pick from fabulous styles and layouts. The modern setup wizard lets you get started instantly.
It is straightforward to customize the samples; no coding skills are needed. Zeen is optimized for speedy page loading on desktops and mobiles. With this theme, you can use WooCommerce and set up an online store.
You can power your creative ideas through pixel-perfect design and cutting-edge technology. This next-generation SEO-friendly News and magazine WordPress theme is easy to use for all levels of users. The single-click installation saves you time and effort.
Key features:
- With every purchase, more than 30 premium pre-built websites are included.
- It is a beginner-friendly theme, and no coding skill is required to use it.
- Tipi Builder is a cutting-edge layout builder that offers you comprehensive control to create appealing websites that run at lightning speed.
- Whether you want to create a simple informative article or a graphics-heavy article, a template is available for every need.
- Front-end theme options help you experience instant previews when you customize the options.
- Apart from supporting multiple languages, this theme is also RTL-ready. The RTL translation of the theme is intuitive and easy.
- The theme allows easy importing of settings and demo content.
- Integration of Google AdSense is possible. It provides plenty of ad placements for your content.
- The theme is fully compatible with WooCommerce.
- The Zeen migration tool lets you import your existing data from another theme.
- Registering a score of 99% on Google’s Page Speed test, the theme has attained a perfect 100/100 performance level.
- An ad-ready template library, drag-and-drop page builder, and various valuable extensions are included.
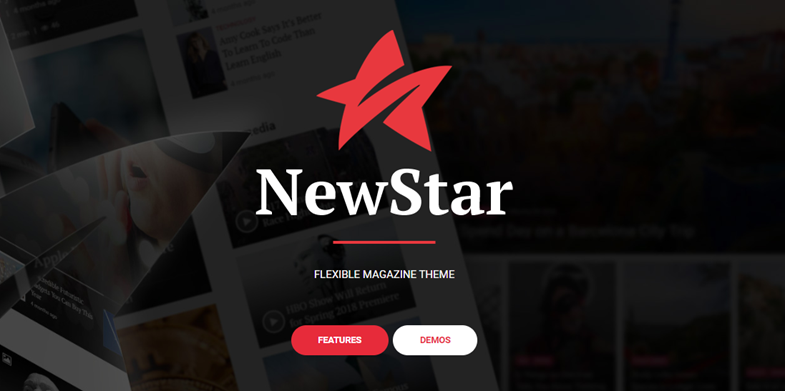
14. NewStar:
Demo Link
NewStar is a highly flexible WordPress newspaper theme designed for every news-first page. You can choose from 12 unique demos. You can use them or enhance them as per your project requirements.
Moreover, you can access custom layouts and make something creative for your website. Coding skill is not required. The eye-catching design and quick loading content make sure your website retains old visitors and keeps getting new visitors.
NewStar is well-known for presenting plenty of headers & footers, neatly boxed and comprehensive blog, sticky menu, portfolio layouts, and child theme readiness.
Key features:
- It includes a dedicated advertising space neatly incorporated with the modern online magazine theme design.
- The installation is easy with a 1-click import tool.
- The theme comes with WPML support and accelerated mobile pages (AMP) support.
- The shortcodes are tailored for News, magazine, Newspaper, publishing, or review websites.
- Other key features include responsive and retina-ready design, fully static page support with shortcodes, diverse custom icon sets, lightning-fast Bold Page builder, flexible article layout, and support for various typography & colors.
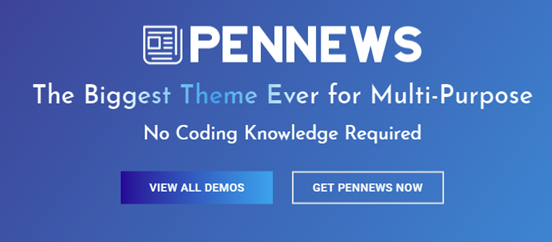
13. PenNews:
Demo Link
PenNews is a sleek, powerful, and responsive WordPress theme for creating news and magazine websites. All vital features that a modern news website requires are included in this theme. PenNews helps your magazine compete with all the leading publications.
Equipped with tons of premium plugins and polished templates, this theme help accelerate your business. You can effectively design page layouts without any knowledge of coding. Furthermore, you can customize various features like a pro with a few clicks through the WPCustomizer.
This theme makes it possible to showcase your stories in exceptional, custom post styles. Moreover, you can easily integrate eye-catching galleries and beautiful portfolios. Facebook Instant Articles and Google AMP keep server expenses low. With the assistance of custom sharing buttons and counters, you can let the News go viral on social media.
Key features:
- Demo import occurs with a single click. All the presented layouts, styles, and elements can be freely merged.
- Traffic monetization is possible with unlimited in-feed ads, ad spaces, and more.
- Your website will load x5 faster on mobile devices with the quick loading of articles and AMP support.
- PenNews is effectively focused on validating schema markup, and Google structured data along with full support for Article, Posts Review, Posts Recipe, Breadcrumbs, Tags, etc.
- Multiple post styles (with various columns) are available for multiple stories. You can adapt the post style for all posts with a single click.
- There is support for smooth parallax images & videos style.
- In each post, infinite scrolls are allowed.
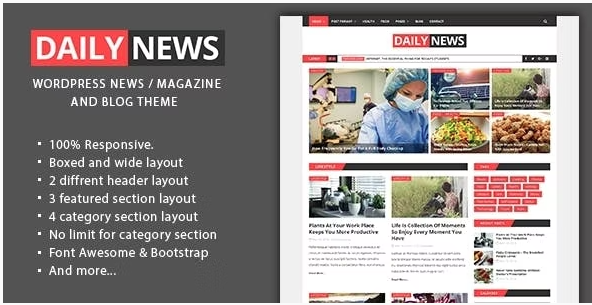
12. Daily News:
Demo Link
Do you want a newspaper WordPress theme that offers great flexibility? If yes, then Daily News can be the best alternative for you. This theme is exceptionally curated for magazine and Newspaper based websites. It supports every possible post format. You get to choose from a wide range of posts types. The minimalistic and straightforward appeal makes sure various post types can blend in.
Key features:
- The customization options range from layout to color schemes.
- It comes with excellent control on a header, footer, and a sidebar with an opportunity to insert widgets.
- Multilevel WordPress menu and social media integration are supported.
- Cross-browser compatibility includes Firefox, Chrome, Safari, IE9, IE10, IE11, and Edge.
- The design features 2 header layouts and 3 featured area layouts.
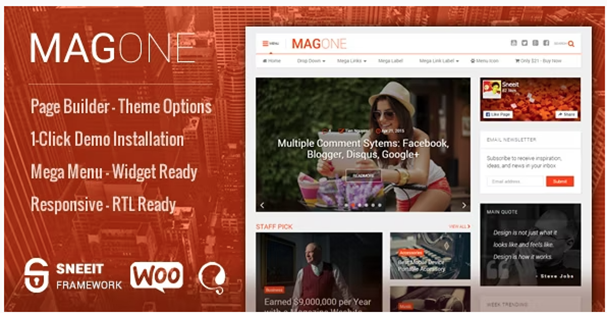
11. MagOne:
Demo Link
If you want to create a news or magazine or portfolio-style website, MagOne can be a great choice because it is elegant, modern, and responsive. Also, it is a wonderful choice for creating professional blogs.
It shows an ideal combination of affordability and flexibility. It boasts a 1-click installer for multiple layouts. Other prominent aspects include a mega menu, a powerful page builder, and different customization options.
This theme is translation ready (supports RTL languages), mobile-friendly, and optimized for advertisements. It is a perfect choice to integrate an online shop with the WooCommerce plugin.
MagOne is a good choice if you want to run editorial websites like professional blogs, online magazines, or newspapers.
Key features:
- Website designing becomes quite easy with 1-Click install and plenty of pre-built layouts.
- It is coded with CSS3 and HTML5. So, all its features like effects and animations appear purposeful and elegant instead of being cluttered and overbearing.
- The user can choose a design layout from available pre-built pages or can create their own with Drag & Drop Page builder. This page builder comes with the Sneeit Framework.
- With a one-time payment, you enjoy free lifetime updates.
- You can configure Floating Menu to show it as a sticky menu whenever you scroll up/down or both.
- Sticky Sidebar helps you to optimize your earnings through sidebar advertisement.
- Readymade Shortcodes help you to create content effortlessly.
- The default editor of Blogger helps you to change the main title design of your post easily.
- ‘Sub Post Title’ helps you add subtitles of post and choose a suitable custom style for it.
- The template supports SpotLingo to translate to easily any language. It is compatible with any RTL language.
- It is easy to change template options via the user-friendly interface of the SpotSettings tool.
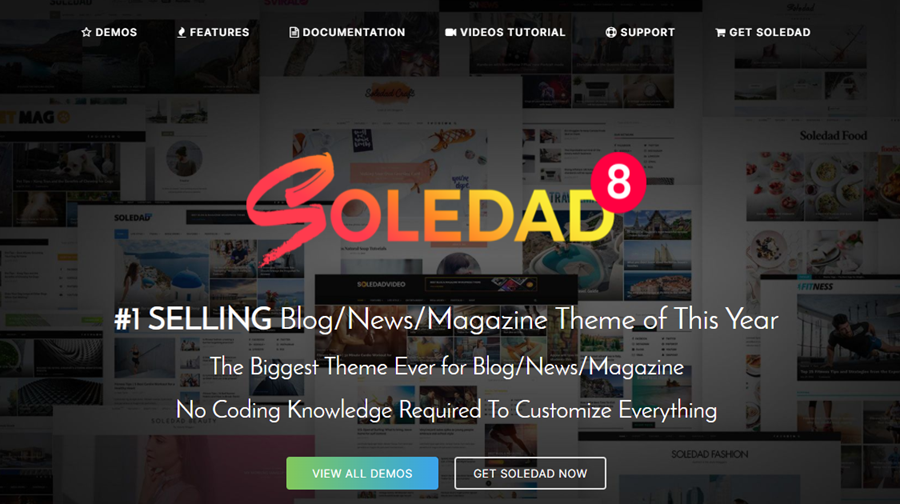
10. Soledad:
Demo Link
You can improve all aspects of your newspaper website with the Soledad. It is an innovative WordPress theme with several practical features and a striking design that instantly impress any reader. Moreover, it is one of the best-optimized themes for SEO.
This theme is highly responsive to all web browsers, operating systems, and devices—no worries about incompatibility. The reason why it is prevalent is it offers variety and quality. Plenty of customization options enable you to craft a commendable newspaper website.
Ease of customization and flexibility are two of its prominent aspects. Within minutes, you can create exceptional and professional News or magazine website. Importing a demo into your site is easy with a single click.
All the available layouts, elements, and styles can be freely combined. No additional costs are involved. You benefit from customization by choosing one of the multiple portfolio layouts.
Key features:
- More than 100 slider and layout combinations are accessible.
- Its WooCommerce support helps those people who want to sell merchandise.
- 6 tailored sidebars are available for every post and page.
- This theme is RTL ready and supports translating all the texts into other texts or languages.
- Theme Options help you to translate all text to your preferred languages in minutes. So, you can effortlessly design multiple languages sites.
- WPML and Polylang plugins are supported.
- JSON-LD support (Valid & Update) is available.
- You can Fast Index your URLs on the search engines.
- 3 diverse ways to configure your website include Elementor Page Builder, WordPress Customizer, or WPBakery Page Builder.
- The theme is compatible with Rank Math, Yoast SEO, All In One SEO, and all other SEO plugins.
- The theme keeps on getting new rules to update from Google.
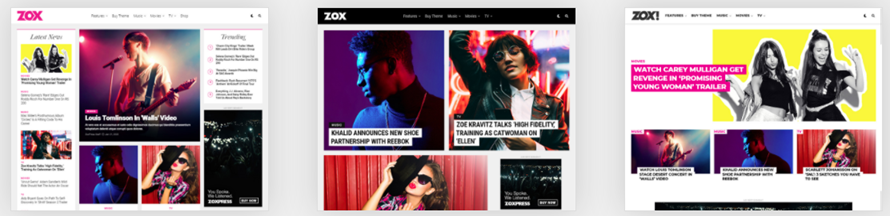
9. ZoxPress:
Demo Link
Boating 15 demos and 100 layout combinations, ZoxPress is famous for presenting many customization options to users. You can effectively create an A-grade newspaper website with its diverse functionalities and customization options. Like other WordPress themes on the list, ZoxPress is compatible with all mobile devices. You need not look elsewhere for extra extensions.
You can translate your website into different languages. It is easy to design a forum using bbPress. Moreover, you can expand your website using an eCommerce section. You can access all tools and design options required to publish the professional news website.
With 100+ homepage combinations, Parallax Inline Article Ads, latest Night Mode, Auto Loaded Posts, single-click demo install, and plenty of other features, ZoxPress may be the most contemporary news theme website on the market.
Key features:
- A lot of news and magazine websites use short teaser headlines within their featured content sections. On the other hand, ZoxPress provides you with the same option to improve your featured items inside the Featured Posts section on the homepage and category pages.
- Full WooCommerce compatibility helps you set up an elegant e-commerce section of your news website.
- With ‘Sticky Featured Videos,’ you can shrink and stick the featured video on posts at the bottom of the screen. So, when visitors scroll down the page, it stays visible every time. A button is available that allows the user to close the video.
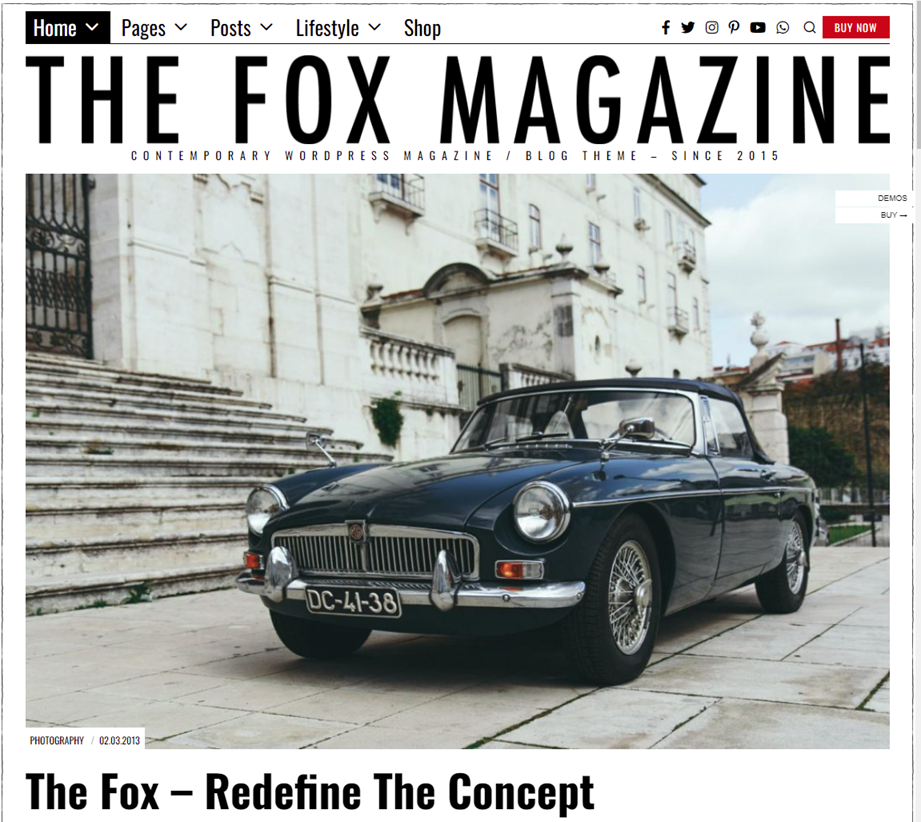
8. The Fox:
Demo Link
Not just for newspaper websites, but you can use The Fox theme for creating commentary magazines. One of its essential functionalities is the WordPress Live Customizer. It comprises additional options and elements for 100+ configurable choices. These choices can upgrade a lot of aspects of your online magazine. Moreover, this feature helps you to fulfill corporate or branding identity requirements.
Fox is super lightweight and responsive. It can be used for creating sites with more than 5,000 posts.
Key features:
- All HTML tags are written inside follow schema.org markup standard. The clean coding makes it perfect for SEO.
- The ‘intelligent related posts system’ allows you to feature posts, access the incorporated photo gallery feature, and showcase display-related articles.
- More than 1,000 options are available to customize layouts, font faces, colors, etc.
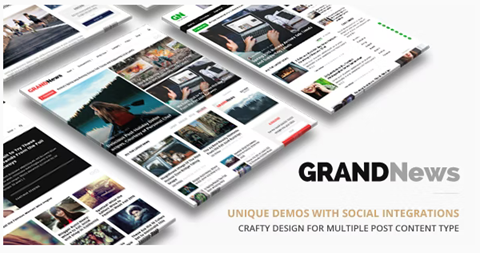
7. Grand News:
Demo Link
Grand News is beneficial for creating News and editorial website. It works as a clean, responsive, and minimal WordPress theme for bloggers and news editorials. It supports various famous WordPress plugins and is implemented with the latest WordPress technology.
The support for a responsive layout makes sure the website created using Grand News appears excellent on all devices. 6 predefined unique demos are uniquely designed for news & editorial websites. These demos can be important in a single click.
You can use this theme to create a great website, as implied by the name. Multiple homepage designs are available and optimized for various news websites.
Key features:
- It comes with more than 40 pre-design templates and content blocks.
- All the templates can be customized through the drag and drop builder.
- This theme is optimized for retina displays, mobile devices, and the WooCommerce plugin.
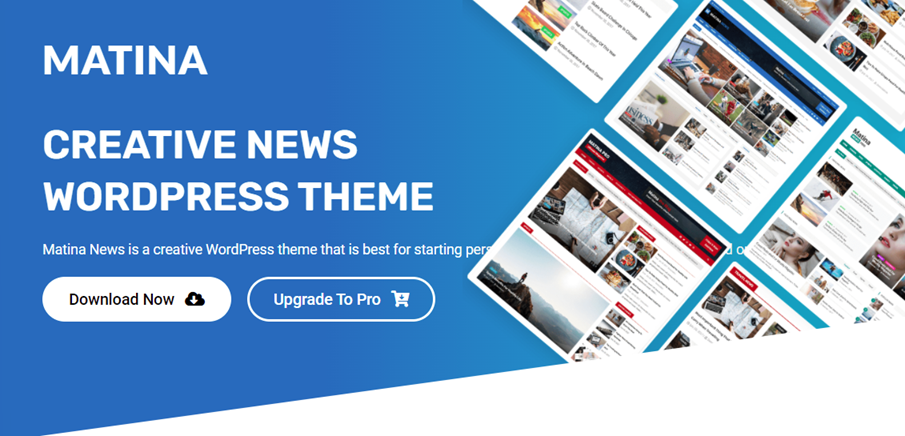
6. Matina News:
Demo Link
Marina News is a popular free WordPress news theme boasting responsiveness, flexibility, and lightweight design. If you are planning to start your news website, then this one can be one of the recommended free WordPress themes. WP magazine modules are included.
Key features:
- Different modules help you design a responsive magazine and news homepage. It provides multiple layouts with multiple customization options.
- Being fully SEO optimized, this theme assists in boosting your ranking on search engines. Also, it leads to faster loading than other themes.
- The theme is Woocommerce plugin compatible.
- The theme supports the majority of the famous plugin that assists you in expanding the features of your website to the next level.
- Names of pre-built demos are MATINA NEWS, MATINA PRO NEWS, and MATINA PRO MAG.
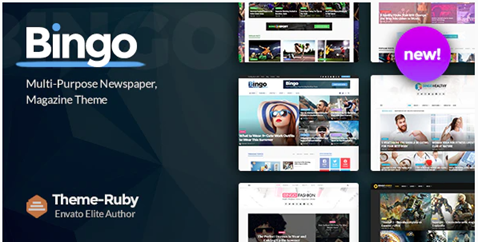
5. Bingo:
Demo Link
Bingo is another fantastic multipurpose Newspaper WordPress valuable theme for building several different kinds of news websites. Due to the multipurpose facet, it is a wonderful asset for web designers.
Once you buy this theme, you will obtain an elegant, modern website with limitless layouts. Also, you gain access to lifetime updates without additional costs. Therefore, Bingo is an outstanding value WordPress theme for Newspaper, magazines, and blog websites.
Key features:
- 7+ unique homepage layouts are included. They are helpful to create websites centered on health, fashion, sports, technology, and many others.
- A layout is available for making video-based content websites.
- Customization is possible with the help of the ‘drag and drop’ editor.
- WooCommerce compatibility is supported for setting up a shop.
- All the queries are optimal, and all profiles are profiled and customized to make sure your website operates quickly.
- 1-click installer helps to import all demos.
- Theme update takes place automatically through the Envato Market plugin.
- Being SEO optimized, the theme is compatible with SEO plugins like All In One SEO, Yoast, etc.
- The theme comes with RTL support.
- More than 700 Google fonts are supported.
- Cross-browser compatibility includes Edge, Chrome, Safari, Edge, IE10, and IE11.
- Being100% responsive, the theme enriches the mobile user experience.
4. The Issue:
 Demo Link
The Issue is a highly flexible WordPress newspaper theme that comes in handy for any online project. With 15 predefined demos, you can effectively create your perfect website.
Not just news-centered websites, but you can use it to create websites related to travel, food, lifestyle, music, fashion, personal, etc.
It streamlines crafting plenty of varied styles without involving in coding. Some of the functionalities that make The Issue stand out are 10 headers, 9 article details, 2 mega menus, 2 review styles, and smart lists for images. The theme is regularly updated to incorporate the newly released features instantly.
Key features:
- You can import pages, demos, or elements separately as needed with a single click.
- A single WordPress license provides you access to all lots of features along with all those functionalities that would be added in the future.
- 7 unique layouts and 3 unique pagination options are included. The pagination options are helpful on Search, Archive, Tag, Author, and Category pages.
Typography options are available in every section on this theme. It allows you to customize this theme as per the font selections.
3. Gillion:
Demo Link
Gillion specializes in writing, publishing, and magazines powered by WP bakery. It is packed with certain practical features that assist you in setup blogs, news sites, publishing websites, or small online shops.
To begin with, creating a news or magazine website, presents various demons that showcase various column arrangements. Moreover, it offers wonderful bookmarking systems and explicit blog features.
Gillion utilizes WPBakery Page Builder in the form of its main page builder and enhances SEO. You gain access to multiple posting formats, unlimited colors, and social icons. To facilitate customization, the design features 4 headers, a top bar, and a blog slider.
The theme presents plenty of documentation and a friendly customer support team. You can benefit from the live customizer to perceive real-time changes.
Key features:
- The design choices include blog posts, sliders, and open post layouts.
- More than 50 blog-orientated modular elements are available to select from. The integration is simplified with a single click. So, it is helpful for beginners and freelancers.
- The theme is pre-made with more than 15 high-quality feature-rich website demons. These demos are ready to be customized and published instantly.
- 6 all-purpose demos can be extended over the normal limitations of WordPress. You can create 6 unique sites with versatile all-purpose layouts with these demos.
- The theme comes with pre-built popular header styles which are mobile optimized. There is an option to add a top bar on each of them.
- Post Layouts help you to incorporate unique style into your website with consistency.
- Open Post Layouts present 5 unique open layout styles that outfit a wide range of purposes.
- Slider Layouts helps in executing professional Sliders when you are not accustomed to them.
- Other key features include intuitive & user-friendly design, one-click integration, integrated social widgets, Post Bookmark ‘Read Later’, ad placeholder, Bookmark/Read later menu, additional top bar, a side menu, fullwidth capability.
- You can access audio, gallery, video, recipes, reviews, and quotes/links when creating websites.
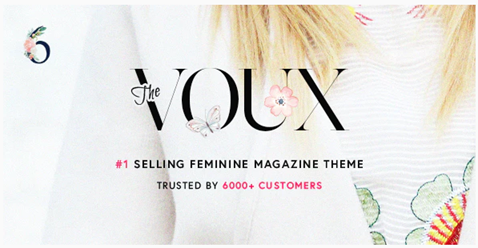
2. The Voux:
Demo Link
If you are on the hunt for a stylish, professional, lightweight magazine theme, then ‘The Voux’ is a decent alternative to consider. The inclusion of various features suitable for various kinds of websites suggests that this WordPress theme is versatile. It presents infinite loading for news articles.
The readers will obtain a streamlined experience. Furthermore, the browser URL automatically updates depending on what page is viewed. This makes it easier to link articles.
Originally designed to be a news theme, it is also suitable for blog themes. The templates show a clean, beautiful design. Moreover, the content blends short excerpts with large grids and blocks with high-scaled images.
The theme excels at minimalistic design, fast responsiveness on small screens, 7 demos, and WPML compatibility.
An effective marketing plan will always explore the enormous potential of social networks. This theme is a ThemeForest pioneer when the matter comes to Social Sharing abilities. Being coded to the supreme quality standards, The Voux is highly responsive to all modern devices. It can scale up perfectly on Retina Ready Screens too.
Key features:
- The theme includes user-friendly headers and Mega Menus.
- Admins can use tags, sub-categories, and categories as sources.
- It is possible to display content with elegant full-screen galleries. With this feature, you can depict your creative posts.
- The responsive layout makes this theme compatible with tablets, smartphones, desktop computers, and laptops.
- It is necessary to ascertain that your page would appear unique from competitors. The WPBakery Page Builder lets you style and customizes each element.
- Site admins could use the Theme options to decide the network across which data sharing occurs. These options are helpful to allot cache periods.
- The Theme Options panel allows you to scroll through demos, general, header & footer settings.
- WPML multilingual plugin support is available.
- Creating beautiful and appealing pages is easy and quick with the Visual Composer front-end and backend page builder.
- The drag & drop interface of the Visual Composer makes website building easy.
- 5 elegantly designed homepages styles are available to let you get started quickly. No coding skill is needed.
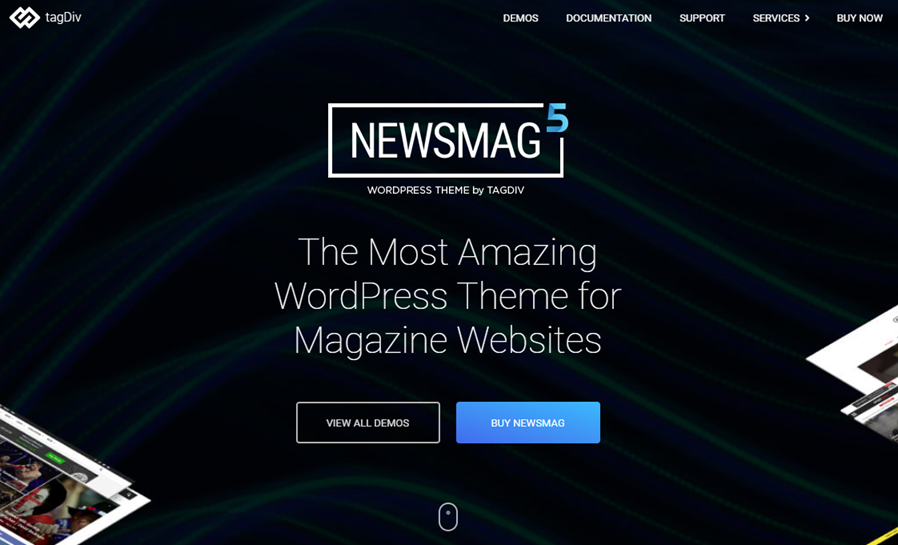
1. Newsmag:
Demo Link
Newsmag is one of the most sought-after templates on Themeforest for news themes. A sophisticated WordPress theme allows you to write and publish blog posts and articles effortlessly.
Its prominent aspects include efficient performance, flexibility, exquisite design, exceptional demos, intelligent ads system, and integrated translations. No coding skill is needed. Furthermore, Newsmag outshines in News, magazine, Newspaper, publishing, or review websites.
Key features:
- The compact and unique design is pertinent for any content.
- The tiny width content area is a beautiful benefit when it’s enhanced by high performance.
- The theme is optimized to work with WordPress SEO from the Yoast plugin.
- It scores well on Google Pagespeed Test.
- It is Google AdSense ready, so it supports mobile-friendly and responsive ads. These ads automatically resize for all devices.
- The insertion of videos is allowed from YouTube. A rating system (points, percentages, and stars) is available for videos.
- By accessing Custom Fonts, Google Fonts, and Adobe/Typekit Fonts, you can modify the fonts directly from the front-end of your website through the tagDiv Composer.
- It is allowed to customize typography, save it as a preset, and then use it later, wherever you like it.
- Every page, post, and category can possess its sidebar.
- The author, tag, search, blog index templates come with custom sidebars.
- The tagDiv Newsletter allows visitors to subscribe to your newsletter.
SmartMag
The multipurpose magazine theme developed by SmartMag is both intelligent and responsive at the same time. Import the theme with ease and customize them to suit your expectations.
What would make it an exciting approach is the fact that you do not need to have any coding knowledge to be able to use or implement it? Choose a demo that appeals to you and personalizes it with the kind of content you would like to serve your audience with.
The drag and drop builder for your pages is yet another excellent feature that simplifies your tasks further. Mostly, it is the simple option for you so that you can concentrate on your content without having to worry about technicalities of how to set up your site.
We would treat SmartMag as a prime and most modern mode of solution for your needs. If you find it interesting and appealing enough, get in touch with https://themeforest.net/item/smartmag-responsive-retina-wordpress-magazine/6652608.
GoodLife
Is your news site dedicated to the kind of audience who is always on a busy schedule? GoodLife can be an excellent choice for catering to such a follower base.
It would simplify the process of news gathering and presentation. One of the features that we like with the theme is that it is completely customized for mobile screens. It is precisely what would help you achieve the best for the visitors who are always on the move and love checking out your site on the go.
Cross-browser compatibility is another feature that makes GoodLife a theme with a super-responsive design. The versatile theme can let you customize it with any niche. Also, several pre-built themes would help you take a quicker decision on what you would want for your news site.
If you would want to give it a try, visit
https://themeforest.net/item/goodlife-responsive-magazine-theme/13638827
Mission News
If your site hosts News from practically every sphere of life, Mission news should be your best choice. It comes with a double sidebar design and thus accumulates more sneak peeks into your website.
Mobile adaptation is another feature that would make it an excellent choice for all your needs. It is one of the highlights that has been one of the most necessary aspects of any theme these days.
You have access to a lot of layouts and customization options. One of the best features of the Mission News theme is the ability to add individual designs to each of your posts separately. Of course, there is a Pro version with additional features if you want to.
You may visit the official site
https://www.competethemes.com/mission-news/ for more information.
Newspaper
A perfect combination of classic style with modern functionality is precisely what we would call the new Newspaper theme. If you are publishing a heavy dose of content on your site, the theme should be your best bet.
Newspaper is what would make it the best option for your needs if you are one of those who likes to publish content multiple times all through the day. There are a lot of customization options to arrange the material under various categories like
Trending News or
Breaking Alert. It offers you a host of layout designs and features that would let you publish a broader range of media-rich content. The theme also supports the right to left languages if you have any such content. One of the excellent mobile-friendly newspaper themes loads quickly, which is incidentally one of the most necessary features of a newspaper theme.
Know more about it through the official site at
https://mythemeshop.com/themes/newspaper/
Click Mag
How about a great theme that suits that style of journalism wherein you have been posting content that usually goes viral? Well, this theme will help you make your content go viral.
Yes, Click Mag is a newspaper theme that is best suited for the kind of content that comes under the category of hottest News and current affairs. In fact, with such type of News and content, the timely delivery and presentation are of utmost importance. Add to it the quicker mobile responsiveness.
Isn’t that a complete package of hippest material ever? The Trending News section can let you drag the attention of your visitors to the most read content on the site. You also have access to a
Continue Reading button that would help you shorten the stories.
In fact, this would be a perfect way to monetize your site better as this would let you add more ads to the articles. The Click Mag is the best theme if your content is fast-moving and looks for an interactive approach for your site.
Check them out at
https://themeforest.net/item/click-mag-viral-wordpress-news-magazineblog-theme/18081003.
Noozbeat
Are you on a news site that looks like a glossy magazine? The high-end cosmopolitan look is what you would get with the Noozbeat theme.
Noozbeat is a newspaper theme that would put your site ahead of all other options regarding glossiness and great looks. You can access more than 30 color options for the layout and several layouts for individual categories.
If you do not want to build a design but want to use one of the pre-built plans for your site? No issues. You have access to over ten layouts that can be used for the homepage of your website. Also, you can choose from among the six different designs for featured posts as well.
High degree of customization is what would help you take the lead over your competitors. Noozbeat offers you yet another advantage that is possibly unavailable on any other theme that may not have added – it comes with built-in ad spaces. This will help you naturally insert the ads. If a magazine-style theme is your pick, Noozbeat should be your prime choice.
If you find the theme attractive and would want to give it a try, check it out at
https://www.cssigniter.com/themes/noozbeat/.
In Conclusion
News is a massive business if you are into building websites or blogs. It is one of the most challenging niches as well. That would explain the vast number of themes available for the slot. The six Newspaper themes that we have featured in this post should form part of a representative list alone. We would recommend you opt for any of them, depending upon the genre and niche of the news categories that your site would be catering to.
Online magazine/ news is a competitive arena, which holds true in the case of themes available for the niche. If you are in doubt, it would be a great idea to check out the live demo if possible. Choose among the best beautiful and feature-rich themes to meet your exact requirements.
Did you like our Best Alternatives to Newspaper Theme by tagDiv article? Which among the themes featured here did you find exciting and valuable for your needs? Please share your thoughts, experiences, and opinions with us through the comments section below.

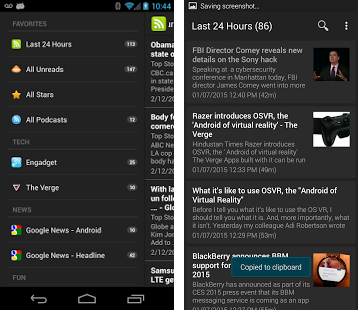 This is an excellent option for creating your Android app from your blog. You do not need to have any knowledge of coding or programming to use the app maker.
AppYet is indeed one of the favorite app makers with the bloggers and used by those who do not have enough knowledge of programming. In fact, it lets you create an app that is entirely customizable. Just provide your RSS feed to the developer, and you should get the app done within no time.
Some of the positive features that the app offers you include
This is an excellent option for creating your Android app from your blog. You do not need to have any knowledge of coding or programming to use the app maker.
AppYet is indeed one of the favorite app makers with the bloggers and used by those who do not have enough knowledge of programming. In fact, it lets you create an app that is entirely customizable. Just provide your RSS feed to the developer, and you should get the app done within no time.
Some of the positive features that the app offers you include
 AppGeyser is an exciting app maker that you may use it to create your Android app from your blogger blog. In fact, the tool should be the fastest option for your needs in making a new app for your blog.
The functionality of the tool is quite simple and easy to follow. The app maker features a Getting Started that solves all your issues in one go. Just let the software know what the type of the app you would want is, and the app will handle the task with ease. Another option that would make AppGeyser one of the best options is the option it offers you to monetize the app.
The features we liked with the app maker can be summed up as
AppGeyser is an exciting app maker that you may use it to create your Android app from your blogger blog. In fact, the tool should be the fastest option for your needs in making a new app for your blog.
The functionality of the tool is quite simple and easy to follow. The app maker features a Getting Started that solves all your issues in one go. Just let the software know what the type of the app you would want is, and the app will handle the task with ease. Another option that would make AppGeyser one of the best options is the option it offers you to monetize the app.
The features we liked with the app maker can be summed up as
 This is yet another easy to use app maker to create your mobile app from your blogger blog. However, you would need to opt for a subscription plan if you want to monetize the app as you do with the blog.
Some of the unique features that the app maker offers you include are
This is yet another easy to use app maker to create your mobile app from your blogger blog. However, you would need to opt for a subscription plan if you want to monetize the app as you do with the blog.
Some of the unique features that the app maker offers you include are
 Users who have opted for the AppMakr consider it to be one of the best and fresh options for creating an app from Blogger blog. In fact, the app maker tool has been one of its kind as it lets you create an app and connect with a host of networks like Facebook, YouTube, and other social media profiles.
Some of the excellent features that the app would offer you would include
Users who have opted for the AppMakr consider it to be one of the best and fresh options for creating an app from Blogger blog. In fact, the app maker tool has been one of its kind as it lets you create an app and connect with a host of networks like Facebook, YouTube, and other social media profiles.
Some of the excellent features that the app would offer you would include


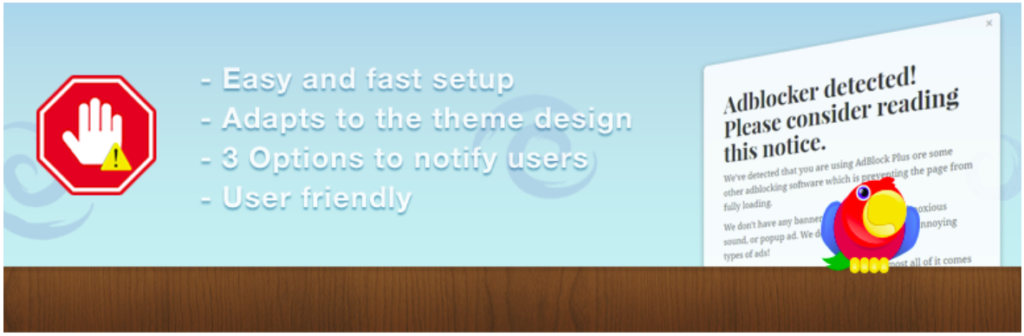 The plug-in uses an approach of convincing the audience about how vital the ad servings are you and them. You try to convince them politely to think over disabling the ad blocker.
The plugin detects if an ad blocker is enabled on the visitor’s browser. If it discovers one, it will notify the user to consider disabling the ad blocker. The exact time that you would want the notification to pop up can be configured. Apart from that, the plugin also offers you a still higher degree of customization. You can make the warning entirely personal with multiple templates, animations, effects, colors, and catchy titles. In fact, the plugin lets you have complete control over the message that you would want your visitors to find.
You can also make the messages more convincing for the users. Trying to explain how essential it is for you to get advertising revenue and keep serving the kind of content that they are enjoying.
The plug-in uses an approach of convincing the audience about how vital the ad servings are you and them. You try to convince them politely to think over disabling the ad blocker.
The plugin detects if an ad blocker is enabled on the visitor’s browser. If it discovers one, it will notify the user to consider disabling the ad blocker. The exact time that you would want the notification to pop up can be configured. Apart from that, the plugin also offers you a still higher degree of customization. You can make the warning entirely personal with multiple templates, animations, effects, colors, and catchy titles. In fact, the plugin lets you have complete control over the message that you would want your visitors to find.
You can also make the messages more convincing for the users. Trying to explain how essential it is for you to get advertising revenue and keep serving the kind of content that they are enjoying.
 The plugin designed to force your visitors to disable the ad blocker. The Ad Blocking Detector detects the ad blocker if enabled and comes with a custom message. The visitors would not be able to move ahead on your site unless they disable the ad blocker.
When the visitor attempts to open your content, the plugin will check whether ad blocker is enabled. If it isn’t, the regular Ad will be shown along with the material. If it finds the ad blocker enabled, it will offer a customized subtle message instead of the content so that the user will have to disable ad blocker if they want to access your content. The anti-adblocker plugin uses shortcodes and sidebar widgets to help you efficiently function against the ad blockers.
The anti-adblocker is entirely customizable.
The plugin designed to force your visitors to disable the ad blocker. The Ad Blocking Detector detects the ad blocker if enabled and comes with a custom message. The visitors would not be able to move ahead on your site unless they disable the ad blocker.
When the visitor attempts to open your content, the plugin will check whether ad blocker is enabled. If it isn’t, the regular Ad will be shown along with the material. If it finds the ad blocker enabled, it will offer a customized subtle message instead of the content so that the user will have to disable ad blocker if they want to access your content. The anti-adblocker plugin uses shortcodes and sidebar widgets to help you efficiently function against the ad blockers.
The anti-adblocker is entirely customizable.
 The plugin is designed to work in an entirely flexible manner. In addition to disabling the ad blocker, it can also improve your traffic.
The Anti Ad Block AdSpaces is very easy to install on your WordPress site. The plugin is continuously updated and thus is compatible with almost all the versions of the WordPress site you may have. In fact, it is a tool that packs in a vast set advantage in a small package. The abilities that the software offers you make it an indispensable tool and the best as a tool for your needs.
It is a flexible and innovative solution that would help you improve the performance of the site in addition to enhancing protection against the ad blockers.
The plugin is designed to work in an entirely flexible manner. In addition to disabling the ad blocker, it can also improve your traffic.
The Anti Ad Block AdSpaces is very easy to install on your WordPress site. The plugin is continuously updated and thus is compatible with almost all the versions of the WordPress site you may have. In fact, it is a tool that packs in a vast set advantage in a small package. The abilities that the software offers you make it an indispensable tool and the best as a tool for your needs.
It is a flexible and innovative solution that would help you improve the performance of the site in addition to enhancing protection against the ad blockers.
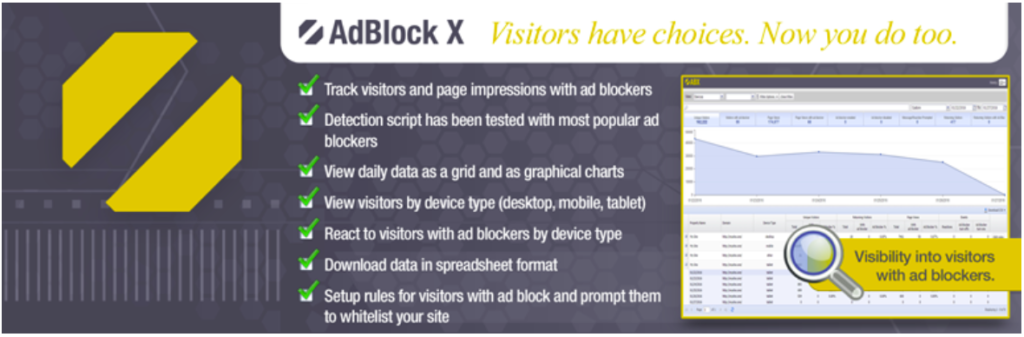 More than being an anti-adblocker, it doubles up as an analytical tool for the impact that the ad blockers have on your site. The free WordPress plugin works as a completely comprehensive ad blocker for all your needs.
The features of the plugin include tracking unique visitors, the visitors who return, and the impact that the ad blockers have on your site’s performance. The grids and graphical charts give a complete insight into the behavior of your site performance. You can create custom messages with Ad Block X. The messages can also be customized to suit the way you would want it to appear. You have access to a user-friendly and more straightforward visual, charts, and grids.
We would treat it as the Google Analytics for Ad Blockers. It would offer you a complete and sophisticated dashboard comprising of stats, numbers, and percentages of visitors with adblockers.
More than being an anti-adblocker, it doubles up as an analytical tool for the impact that the ad blockers have on your site. The free WordPress plugin works as a completely comprehensive ad blocker for all your needs.
The features of the plugin include tracking unique visitors, the visitors who return, and the impact that the ad blockers have on your site’s performance. The grids and graphical charts give a complete insight into the behavior of your site performance. You can create custom messages with Ad Block X. The messages can also be customized to suit the way you would want it to appear. You have access to a user-friendly and more straightforward visual, charts, and grids.
We would treat it as the Google Analytics for Ad Blockers. It would offer you a complete and sophisticated dashboard comprising of stats, numbers, and percentages of visitors with adblockers.
 As the name itself should be an indication, the Simple AdBlock Notice comes up with a pop up whenever it detects a visitor to your website with an enabled ad blocker. In fact, it does nothing to block the ad blockers, but only suggests the visitors whitelist your site.
Some website owners believe that using anti-ad blockers amounts to illegal practices and thus can invite an unwanted penalty from Google. Unless you are not sharing malware, it should not be of any concern to the search engine giant. However, if you are still worried, Simple Ad Block Notice should be your best bet. The pop-up message displayed by Simple Ad Block Notice is wholly customizable and user-friendly to create. However, you also have access to a Strict Mode which would force the visitor to disable the adblocker if he wants to have access to the content on your site.
Ensure that your site is not filled with many crappy ads that do not make any sense.
As the name itself should be an indication, the Simple AdBlock Notice comes up with a pop up whenever it detects a visitor to your website with an enabled ad blocker. In fact, it does nothing to block the ad blockers, but only suggests the visitors whitelist your site.
Some website owners believe that using anti-ad blockers amounts to illegal practices and thus can invite an unwanted penalty from Google. Unless you are not sharing malware, it should not be of any concern to the search engine giant. However, if you are still worried, Simple Ad Block Notice should be your best bet. The pop-up message displayed by Simple Ad Block Notice is wholly customizable and user-friendly to create. However, you also have access to a Strict Mode which would force the visitor to disable the adblocker if he wants to have access to the content on your site.
Ensure that your site is not filled with many crappy ads that do not make any sense.
 This is yet another anti-adblocker plugin that is quite harsh on the part of the users who have enabled ad blockers. Your visitors would not be able to have access to the content on your site until they disable the Ad Blocker.
The functionality of the plugin is quite simple and easy to use. Install the plugin and click on Kill AdBlock Settings under your wp-admin menu. You can then select or deselect all your preferences as per your choice. You can create your message as well. The popup can be shown in any of the three modes that you can choose from – Sticky Bar, Full Screen, and Flying Box. Ensure that the custom messages you use on your anti-adblocker are not aggressive for the visitor. One of the features that we liked about the plugin is it is swift to install and configure.
You can use the messages indicating the benefits of disabling the Ad Blocker and how crucial it is to you for your survival.
This is yet another anti-adblocker plugin that is quite harsh on the part of the users who have enabled ad blockers. Your visitors would not be able to have access to the content on your site until they disable the Ad Blocker.
The functionality of the plugin is quite simple and easy to use. Install the plugin and click on Kill AdBlock Settings under your wp-admin menu. You can then select or deselect all your preferences as per your choice. You can create your message as well. The popup can be shown in any of the three modes that you can choose from – Sticky Bar, Full Screen, and Flying Box. Ensure that the custom messages you use on your anti-adblocker are not aggressive for the visitor. One of the features that we liked about the plugin is it is swift to install and configure.
You can use the messages indicating the benefits of disabling the Ad Blocker and how crucial it is to you for your survival.


