
In this article, we explain how to configure WordPress on AWS free Tier. If you want to try out WordPress on Amazon’s robust infrastructure then this article is for you.
Also Read: Best Practices and Steps to reduce HTTP requests in WordPress Posts
Cloud computing is trendy since it is cost-efficient, secure, and a reliable approach to host any online project. The AWS (Amazon Web Services) offers an efficient cloud infrastructure. In simple terms, AWS is a secure and flexible on-demand cloud computing platform. It is extensively helpful to manage your online projects.
Also Read: Checklist and Best Practices to Setup W3 Total Cache Plugin for WordPress
You can use it on multiple computers for tasks ranging from setting up a server to hosting a WordPress site. Though AWS is considered for more significant projects, it can be used for your job if you want to benefit from scalability and efficiency. The below section shows the practicality of this platform for WordPress:

The usefulness of AWS for WordPress:
-
Enhanced user experience
-
Flexible and scalable
-
Complete Ownership
-
Cost-effective platform
-
Ease of migrating WordPress site
-
Boost in website performance
Now let’s look at the detailed steps on how to install WordPress on AWS free tier:
Method-1: Configure WordPress on AWS free Tier:
Step-1: Signing Up for an AWS free tier account:
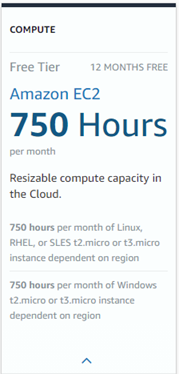
The AWS Free Tier offers you a 12 -month free, practical experience, including the majority of the services provided by the AWS platform. You can sign up for an AWS account at 750 hours/month, including Linux and Windows t2.micro instances for a year. To stay within the free tier, you will only use the EC2 Micro instances.
Step-2: Setup of Amazon EC2 Instance:
To set up Amazon EC2 Instance, follow the below steps:
-
Login to your AWS account and launch the AWS Management Console
-
In this console, find the EC2 under ‘Compute’ and then double-click on it to launch the EC2 dashboard. Now, click on ‘Launch Instance’ to set up and configure your EC2 instance.
Step-3: Installation of WordPress on your EC2 Instance
The AWS Marketplace consists of plenty of Amazon Machine Images (AMI), which can be used to set up a good number of commonly used software instantly. Usually, the AMIs are pre-configured with the ideal settings for operating on AWS. This step will use one of these AMISs for the installation of WordPress. Follow the below steps;
-
From the left menu, click on ‘AWS Marketplace.’
-
Now search for ‘WordPress’ and then for ‘WordPress powered by BitNami’
-
Press the blue ‘Select’ button
Step-4: Validate the pricing:
In this step, you need to confirm the pricing for your instance. Don’t worry, as it is free of cost for the software, irrespective of the size of the instance you use.
Note: This step uses a free-tier eligible t2.micro instance.
Follow the following steps:
-
Navigate down and choose ‘Continue.’
-
In the ‘Type’ column, click on ‘t2.micro.’
-
Now click ‘Next: Configure Instance Details. Please wait for a few seconds to load it.
-
In the subsequent screens, click on ‘Next: Add Storage’ and finally click on ‘Next: Tag Instance.’
Step-5: Setting name, for instance, and reviewing it:
To set a name for your instance, enter ‘Name’ in the ‘Key’ box and ‘WordPress’ in the ‘Value’ box.
-
Click on ‘Review and Launch’ to proceed further.
-
Confirm the instance last time before moving on. Now click on ‘Launch.’ By doing this, it will launch your Amazon EC2 instance that operates on WordPress.
Step-6: Configuration of Key-Pair for SSH:
Key pairs denote how you can connect them to your EC2 instances through a terminal program with the help of Secure Shell (SSH). Keep in mind that you must have a key pair to log into your terminal. Follow the below steps for the configuration:
-
Choose ‘Proceed without a key pair’ and tick a mark on the box to validate that you know you require this key for accessing your EC2 instance.
-
Now click on ‘Launch Instances’ to launch your instance. Wait a few minutes to begin the instance.
Step-7: Test your WordPress Instance:
It is essential to check whether your WordPress Instance is running or no. These are the steps to follow:
-
From the bottom right part, click on ‘View Instances.’
-
Now select the WordPress instance. (Make sure the ‘Instance State’ shows as running. But if the ‘Instance State’ shows up as launching, AWS is yet busy creating your WordPress instance.
Step-8: Test your site:
After your instance gets running, follow the below steps to test the WordPress website:
-
Search for the ‘Public IP’ for your instance at the bottom of the page.
-
Now copy that IP in a new tab inside your web browser. (When you do this, you must notice the well-known ‘Hello World’ WordPress home screen.)
The installation of WordPress on your AWS free tier EC2 instance now completes.
Step-9: Configuration of the newly set up WordPress website:
Once your WordPress website begins running, you have to log into the admin page to customize the settings. However, before that, you should have your admin password. Follow the below steps:
-
Open your EC2 dashboard and choose your WordPress instance.
-
Click on the ‘Actions’ button.
-
From the drop-down menu, choose Instance Setting > Get System Log.
-
Browse through the ‘System Log’ popup to find out the password for your WordPress admin.
-
(You can easily find the password enclosed by hash marks.)
-
Copy the password to some external file or note it down.
-
Open your WordPress website.
-
Now add /admin to the URL’s end.
-
Click on enter, and it will show up login page of your WordPress site.
Whenever you want to log in, you can enter the default username and password you copied above. Now you can control, customize, and configure your WordPress website. It is recommended to change your username and password.
Method-2: Using AWS through managed WordPress hosting:
The first method discussed above may feel technical and complex. The cloud computing infrastructure presented by the AWS platform is a pay-as-you-go solution. So, the traffic spikes will significantly raise your hosting expense. However, it is easy to manage your service through a managed WordPress hosting provider.
It is better to use WP Engine since it executes a portion of its hosting platform on the AWS infrastructure. Moreover, you need not worry about server management, traffic spikes, or WordPress maintenance.
You can try out another alternative -Pagely, which is a top-notch managed WordPress hosting provider. It also operates its platform on AWS and provides an ideal WordPress environment to scale up your business.
